
Inspect the pan
Do not use SMART-O® as a substitute for thread repair if oil pan threads are worn or damaged.
Plug specification guide
A simplified reference page for SMART-O® plug families, thread logic and fitment support. Always confirm the original plug dimensions before installation.

Reference
SMART-O® plug selection should be based on thread diameter, pitch, shank length, flange diameter and the original plug condition. This hub provides guidance, but the final match should always be checked physically.
Open Form-Fit-Function chart Open guide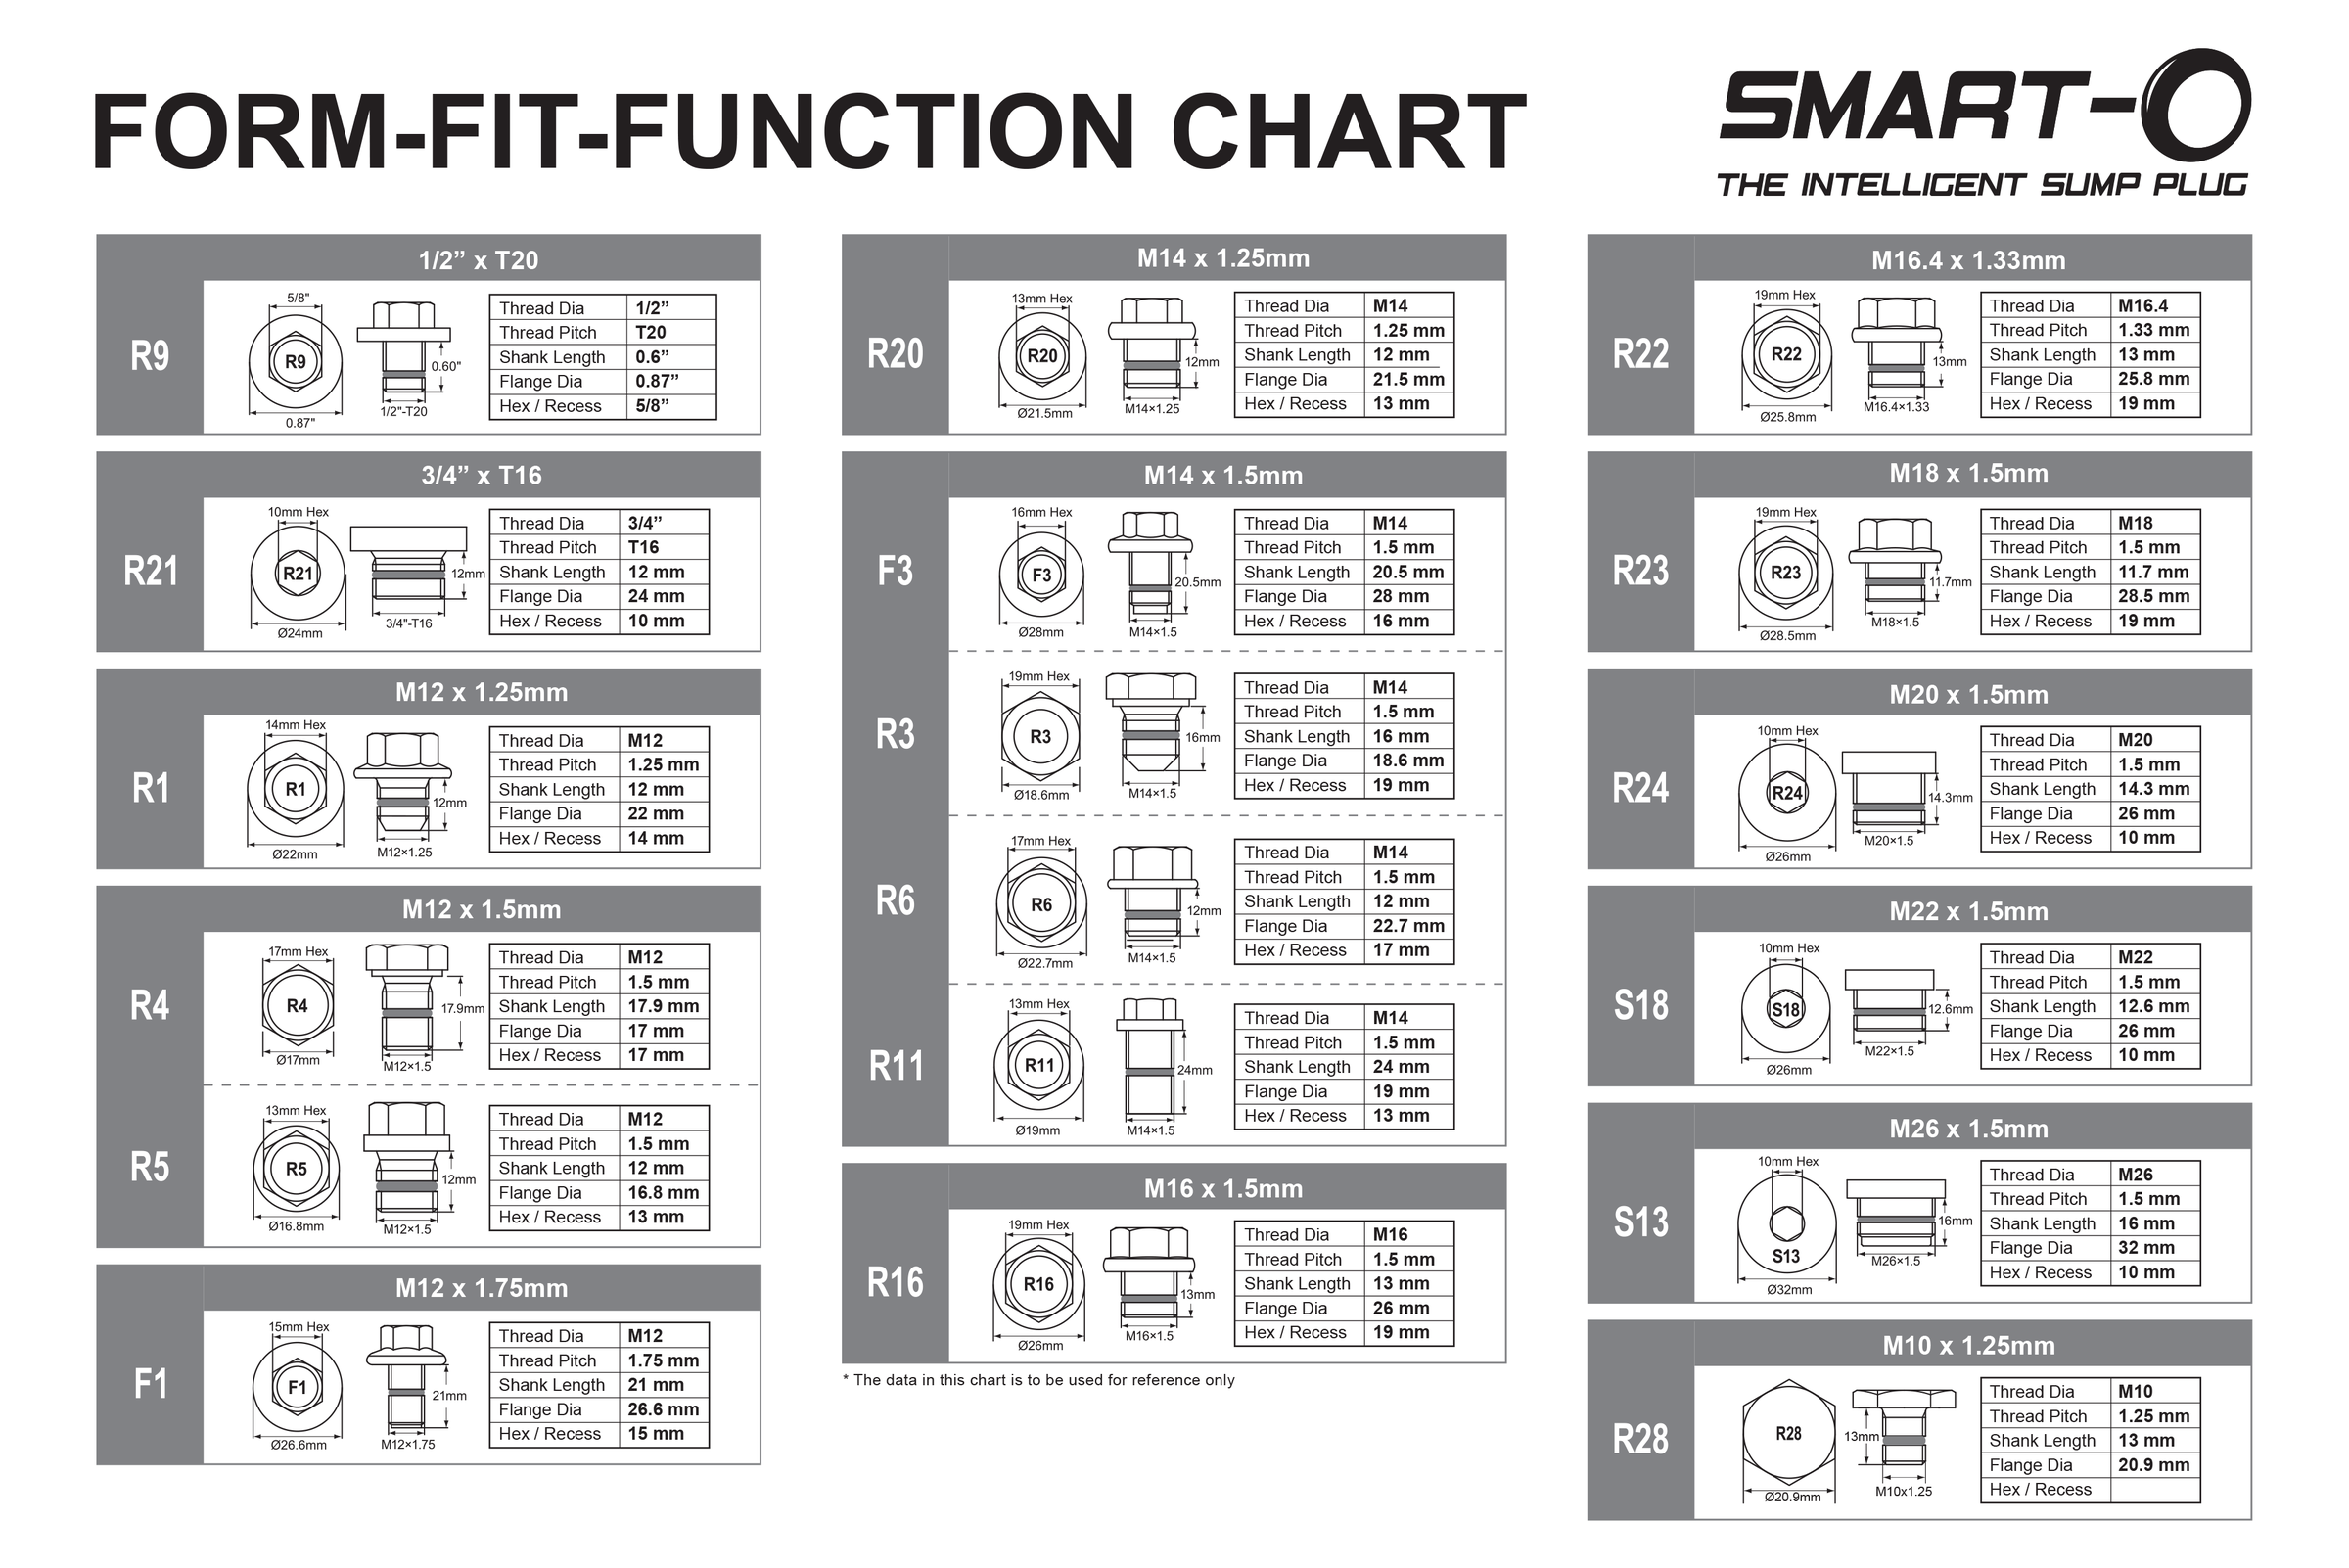
Before installation
The chart and guidance help reduce guesswork, but final fitment should always be checked against the vehicle and original plug.
Do not use SMART-O® as a substitute for thread repair if oil pan threads are worn or damaged.
Compare thread diameter, pitch and shank length before installation.
There should be no resistance until the O-ring grips.
Service guidance
The O-ring must be intact to ensure proper performance. Metal washers should be changed with every installation. Polymer flange seals may be reused if they remain intact.
Torque guidance and plug-size references should be treated as technical support, not a replacement for manufacturer requirements.
Download workshop chartConfirm diameter and pitch against the removed plug.
Confirm the shank length and flange diameter are appropriate for the oil pan.
SMART-O® improves the drain point, but it does not repair severely damaged pan threads.